2.27.2010

More Colorful Flowers!


In class on Wednesday, we learned seven--yes, seven--new flowers. My icing was a little soft that evening and didn't hold its shape as well as it should have, so I won't show you those pictures.


In my last post, I showed you the violets and mums that I made with colored icing. Today, I'm going to show you the colored icing versions of the flowers we learned in class last week. This Wednesday is our Level II Course final class, so I'll be assembling my cake. I made up all these flowers so that they would be dry and ready to go on Wednesday.


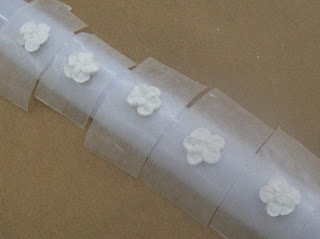
First, I added the yellow accents to the violets...


Here are the daisies...


...apple blossoms...


...primroses...


...pansies...


...daffodils...


...rosebuds, which will look better wrapped with some leaves,...


...and Victorian roses. Its petals have a soft curl to them unlike the roses we made with buttercream a few weeks ago. A different tip adds this softness to the edges.

Come back later this week to see pictures of my finished cake! Thanks for stopping by!

2.25.2010

What a difference a little color makes!


Last week, I shared with you some pictures of the first flowers we made using royal icing instead of buttercream. I decided to go ahead and make the mums and violets for my final cake with some of the leftover icing. I colored my icing before making them. I have to say that adding a little color makes a huge difference, don't you think? These flowers will harden and be all ready for class next week when we make our final cake for the Level II Course. Thanks for stopping by!

2.24.2010

Lindley's Birthday Cake


I've been telling you about the preparations for this cake for two days. Today, I'm finally showing you the whole cake! The cake itself was pretty simple. The birthday girl requested vanilla cake with vanilla icing--even though I was fully prepared to make something coconut or pineapple inspired for the "Aloha!" theme.  Mmm, maybe I'll make something here at home like that just for me.

At any rate, here's the final cake for you to see.  The color flow pieces dried flat--not curved, so they aren't flush against the side of the cake.  Note to self: Dry sugar plaques on drying forms or only put them on the flat top of cakes from now on.

The flip flops are pretty cute, I think. Since they worked out well, I had two extra pair, so I sent them along with the cake for the girls to enjoy at the party. Lindley's mom said the first thing Lindley said to every girl that came in the door was, "Look at my cake!" She was very pleased with it, and that made me happy. Thanks for stopping by!

2.23.2010

Sugar Cookie Flip Flops


In yesterday's post I told you about a special birthday cake I made last week. In addition to it being an "Aloha!" themed cake, I found that flip flops were going to be involved. Her mom mentioned to me that the girls were going to be decorating their own flip flops at the party. Since I hadn't found much inspiration for a young girl's "Aloha!" party, flip flops seemed like better inspiration to me.  I went about looking for flip flop cakes. You would be surprised how many are out there!

I haven't learned how to use gum paste or fondant yet, or else maybe I would have used that to make flip flops instead. Or maybe I would have made big hibiscus flowers and never even thought about flip flops, but it's too late for that now.

I do know cookies! In fact, I decided to use a new roll out sugar cookie recipe that I just tried and posted about here. I traced around an old pair of my son's flip flops to get a pattern. I shrunk it a little to fit on my cake, cut it from cardstock and then traced around it with a knife in the sugar cookie dough. I made three pairs just in case something didn't work right, a little boy stuck his finger in one, the dog took a bite while I was picking my kid up at school, etc. Before baking, I used a drinking straw to make holes where I wanted to insert the licorice thongs later.

They turned out surprisingly well! I used scissors to trim the licorice pieces, using some royal icing for glue.  Then I flooded/covered them with color flow icing.  I knew it would give the smooth finish I wanted, and I wanted to use my extra up from class.  I didn't want it to go to waste, and I didn't have any other uses for it in mind. Stop by tomorrow to see the finished cake! Thanks for stopping by!

2.22.2010

Aloha! Color Flow Pieces


Wednesday was my birthday. Friends of ours have a daughter with the same birthday. Last year, I made her monogrammed cards. This year, I thought maybe I would offer to make her a birthday cake or cupcake or something. I talked to her mom a few weeks ago, and we decided I would make a cake for her birthday party.

Her party was going to be "Aloha!" themed with eight little girls in attendance. The birthday girl was going to turn ten. I started looking online for cakes with that theme, but wasn't very satisfied with what I found.  I'm picky. A lot of the cakes were for honeymooners or couple's anniversary parties, not for little girl's birthday parties.

After learning how to use color flow icing on Wednesday at class, I decided that's how I would incorporate the "Aloha!" theme into the flip flop cake. I searched online for some clip art to use, printed it, and made the sugar plaques, starting with outlining the images and then flooding the pieces with different colors of thinned icing.

I was concerned that the pieces wouldn't dry in time, so I made them thinner than normal and placed them in front of a small fan in my bathroom! Thankfully, they dried enough in time to finish the cake. Stop by tomorrow to see more of the cake preparations. Thanks for stopping by!
 

2.21.2010

Color Flow Icing Lesson I


On Wednesday evening, we also learned how to use color flow icing, which I had never even heard of before. (Read about our royal icing lesson in yesterday's post.) You use the icing to make sugar plaques that you can then place on cakes. Color flow icing is made with confectioner's sugar, color flow powder and water.


You start out with a line image that you want to copy. You place the image under a piece of waxed or parchment paper. Then, using stiff full strength color flow icing, you use a round tip to trace the linework of the image. These birds came from our Level II Course Instruction Booklet.

After completing the linework, you thin the icing with water and color it. You make it very runny so that it will "flood" the areas you wish to fill.  The full strength linework acts like a dam for the thinned icing.

I completed the blue parts at class and then brought them home to finish. It was easier to thin and color the icing in my own kitchen. They are now sitting in my laundry room drying on a cookie sheet.  They take quite a while to dry hard enough to pick up and place on a cake. These birds will be used on my final cake. Thanks for stopping by!

2.20.2010

Royal Icing Lesson I


My cake decorating class was cancelled two weeks ago due to weather.  When we met on Wednesday evening, we started working with two new types of icing:  royal icing and color flow icing.  I'll show you my color flow icing project tomorrow.


Royal icing is made with confectioner's sugar, meringue powder and water. Using the royal icing, we made two new types of flowers:  mums and violets. We learned how to make violet leaves too. If we want, we can make these flowers to use on our final cake for the Level II Course. When the royal icing dries, it's very hard, and you can simply pick the flowers up and place them on your cake.

I'm going to use my extra royal icing here at home to make more violets and mums. I'll color my icing and make them to be used on my final cake. Royal icing is much different than buttercream.  Unfortunately, it doesn't taste nearly as good.  Maybe I should work with royal icing more often so that I don't eat as much icing as I use to decorate! Thanks for stopping by!

2.18.2010

Chicken Korma

Jim and I really enjoy Indian food. I have even cooked it quite a bit. I have used a few different recipes over the years that have become favorites, and couple are good, but I would like to find better. My favorite Indian dish is any kind of korma: chicken, lamb, vegetable, it doesn't matter. I have not found a good korma recipe yet.

The current Taste of Home magazine has a short article in it with a few Indian recipes, one of which is Chicken Korma. I made it for dinner the other evening. It was a bit of a disappointment. It called for sour cream, annd I chose to use plain yogurt instead. Maybe the sour cream makes a huge difference, but to us it was really bland. I don't know if I'll try to make it again or not. I wish I could find a great korma recipe. If you have one, please let me know in a comment!

Since the recipe is in the current issue of Taste of Home, I can not link you through to it. It's only available to subscribers. Sorry. Thanks for stopping by!

2.17.2010

Dairy Queen Birthday Cake


My parents always come to visit in February, and while they're here, we celebrate my birthday. Since there have been so many cakes and cupcakes around here lately--a consequence of my cake decorating classes--they decided to take my two boys to Dairy Queen to pick out an ice cream cake for my birthday. I thought it was a pretty nifty idea the way they used ice cream cones on it, so I decided to share it here with you all. Thanks for stopping by!

2.15.2010

Windowpane Hearts--or whatevers


My oldest son wanted to make these Windowpane Heart cookies from Family Fun for Valentine's Day. I told him we would, but with the school Valentine's Day party and his grandparents visiting last weekend, we made them after Valentine's Day. Consequently, we decided not to make them heart-shaped, but used different cookie cutters instead.

I mixed them up on Saturday thinking that they would be fun to make with Grammy, but the weekend got busy, and we didn't get to it. The dough was in the fridge waiting for us, so we made them this afternoon after the grandparents left to go home. We were stuck indoors watching it snow, so it was a good snowy day activity.

The boys had fun helping to roll out the dough, and it wasn't messy, because the recipe tells you to roll it between two layers of waxed paper. I DO NOT enjoy making cut out cookies, but this was the best cut out cookie recipe I have used to date. I am pretty sure I will use it again to make normal cut out cookies to decorate with icing.

What makes this recipe special is that you bake the cookies on aluminum foil and fill the cut out centers with hard candy. Similar to the Family Fun recipe, we used Jolly Ranchers. The pieces were too big for our small openings, so I used a heavy knife to "whack" the pieces into halves on a cutting board. The boys liked dropping the pieces of candy into the little holes in the cookies too.


I can not even begin to tell you how pleased I am with the way these turned out. I did not have high hopes for them turning out anywhere near as pretty as the Family Fun shows them, but ours did! Yay! It's the little things in life, isn't it? The boys had fun and were so surprised at what they looked like when they came out of the oven. It was a fun baking day with the boys. Thanks for stopping by!

Kindergarten Valentine Party Crafts

These will be posted over on my stamping blog tomorrow, because these are craft-related.  However, they use food, so I decided to share them here on the cooking blog too, even though they're not cooked or baked.  Enjoy!

I planned the crafts for last week's kindergarten Valentine's Day party, and I wanted to share them with you.  It makes me happy.


The first project was a Jolly Lolly from the Family Fun website.  I made lots of mustaches and kissing lips out of craft foam for the kiddos to choose from.  Of course, there were black, brown and blonde mustaches along with bright red, pink and fuschia lips for all tastes.  I had them all cut out with the holes punched so the kids just chose the "mask" and slid it onto a lollipop stick.  Then, I printed mailing labels, one for each child, that said, "Happy Valentine's Day! Love, (insert name here)"  That also made it easy to tell who had made the craft and who hadn't based on whose names were still left on the sheet of labels.


Next, the kids made these little Candy Airplanes, also from Family Fun. I bought cheap valentines stickers for the kids to use to decorate the stick of gum. Then, they assembled the biplane with help from the parents and aides at the party. I had the candy and rubberband in individual baggies for each child. Once they built the plane, they put it back in the baggie and affixed another mailing label that I printed to say, "Valentine, you make my heart soar!" with little biplane cliparts on each side.

The kids all seemed like they had lots of fun making these cute valentines to take home and give to parents, siblings, grandparents, whoever. Thanks for stopping by!

2.10.2010

Valentine Cupcakes


Last week when I made groundhog cupcakes, I didn't want to make a whole batch of them, so I just decorated a few and froze the rest. I decided to get them out today and ice them for the boys.

I had a big bowl of buttercream icing in the fridge, and if I didn't get it out and use it on something, I was going to sit and eat it spoonful by spoonful until it was gone. The cake class has been fun, but I think I've gained 2-3 lbs. from it! I have a weakness for buttercream icing.

Anyway, I thought it would be best for me to use it up on something that the boys and Jim would eat instead of me. I also wanted to try out the new jumbo star tip I bought for doing cupcakes like this. These were super easy, but aren't they pretty!?! Thanks for stopping by!

2.09.2010

Grilled Burritos

I got a craving for burritos. Our oldest son doesn't like it when we go to Taco Bell, so I decided to make my own at home. Sorry I didn't take a picture of them to share! Here's my "recipe":
Grilled Burritos

1 can fat-free refried beans
1 lb. ground beef, browned
1 pkg. taco seasoning
1 packet Knorr Spanish rice
shredded cheese
large tortillas
sour cream, salsa, guacamole, whatever toppings you like

Add the taco seasoning to the ground beef according to the instructions. Make the Spanish rice according to the package directions.

Make an assembly line where you add a little of the beef, beans, rice and shredded cheese to a tortilla. (Jim omitted the beans and added pepperoncinis to his.) Wrap it up, placing it with the flap side down.

Make as many of these as you want to have for your meal. Heat a skillet or grill pan with a little butter or non-stick cooking spray. Grill the tortillas for just a minute or two on each side until they are light brown and toasty. Be careful not to lose the fillings out of the center.

Serve hot with sour cream, salsa, guacamole, whatever toppings you like. Enjoy!

Thanks for stopping by!

2.08.2010

Peach Cobbler

Have you ever seen the Peach Cobbler recipe where you start with a melted stick of butter in your baking dish? I got a recipe like it years ago just after Jim and I were married. I hadn't made it in a long time, and then I saw it again on a blog that I used to follow. I made a few changes to it, and here's my version of it.
Peach Cobbler

1/2 c. butter
1 1/2 c. flour
1 c. sugar
4 tsp. baking powder
1 tsp. cinnamon
1 1/4 c. milk
1-29 oz. can sliced peaches

Preheat the oven to 375 degrees. Cut the stick of butter into about eight 1 T. pieces and place them in a 9x13 baking dish. Put the baking dish in the oven while it's preheating to melt the butter. Watch it closely so that butter doesn't start to brown.

Strain the peaches and reserve the juice in a glass measuring cup. (I used sliced peaches with no sugar added in pear juice. You may use whatever variety you wish.) Add water to the juice, if needed, to have 1 c. of liquid.

Using a wire whisk, mix the flour, sugar, baking powder, cinnamon, reserved juice and milk in a large bowl. Pour the batter mixture into the baking dish over the melted butter. The butter and batter will swirl together on their own somewhat. Do not mix them.

Lay the peach slices evenly in the dish. I like to place each one so that the whole dish is covered evenly with a layer of peaches. I may try using more peaches next time so that there's more fruit in the finished product.

Bake the mixture for about 40 minutes, until the top is light brown and the juices are bubbling around the edges. Enjoy!
I made this for a stamping workshop earlier this week and got many compliments. Give it a try the next time you need a quick and easy dessert! Thanks for stopping by!

2.06.2010

Wilton Method Cake Decorating Class Level II


Wednesday evening, I had my first Wilton Level II Cake Decorating Class. We practiced some of the techniques we learned in the Level I Course and then learned some new techniques.

The Level II Course Kit comes with two little oval-shaped cake pans. We used one of them this evening to practice our new techniques on after learning them first on our practice boards. The photo above shows my cake pan after I finished it. The sides have the basketweave technique on them. The bottom has the rope border and the top, the reverse shell border.

This is the last week we'll be working with buttercream for a while. Next week, we'll be starting with Color Flow icing and Royal icing. I can't wait to try out all the new flowers we're going to learn to make! Thanks for stopping by!